Git Tutorial for Beginners with Examples
Today I would like to bring Git Tutorial for beginners with examples. Here we cover the following
What is a Version Control System
In software engineering, version control systems are a category of software tools that help a software team (multiple developers, designers, and team members) to work together on the same project and allow them to manage changes to computer programs, documents, websites, and other information over time.
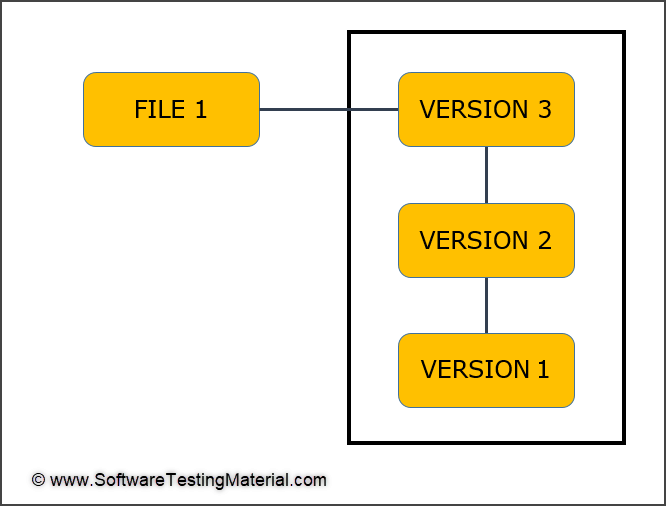
Version Control Systems maintains all the edits and historic versions of the project. So that teams can recall specific versions later.
Version Control is useful if you are a software engineer or if you are into software development.
Let’s say that we are working on a source code. in this case, we add/edit/delete lines of code. Every time we make a change and save the file, we lose the previous changes. Tracking revisions over time becomes more complex when we are working on a large project with multiple files and multiple developers. We not only want to record changes but also want to record who made the changes and when.
Version Control System is required to manage revisions at this level.
Version Control is a technology that allows software engineers to control the version of the piece of code. Version control helps in collaboration among the developers/users to help them work independently on their modules as well as be updated with the changes happening on the other modules of the projects.
It’s safe to have a version control while developing a software. It’s always risky to develop without having a version control system as not having backups. As time progresses, there is a significant amount of evolution on the applications on which the developers are working on. So they need to have different versions of the application so that in the future if they want to revert some functionality they can revisit the previous version and do intended behavior.
Types of Version Control Systems
Local version control systems:
The files are copied into another directory (most likely a time-stamped directory). It does not record or maintain any information regarding why we made changes. It is quite simple but at the same time incredibly error-prone. This model will work only if one person is working on one project.
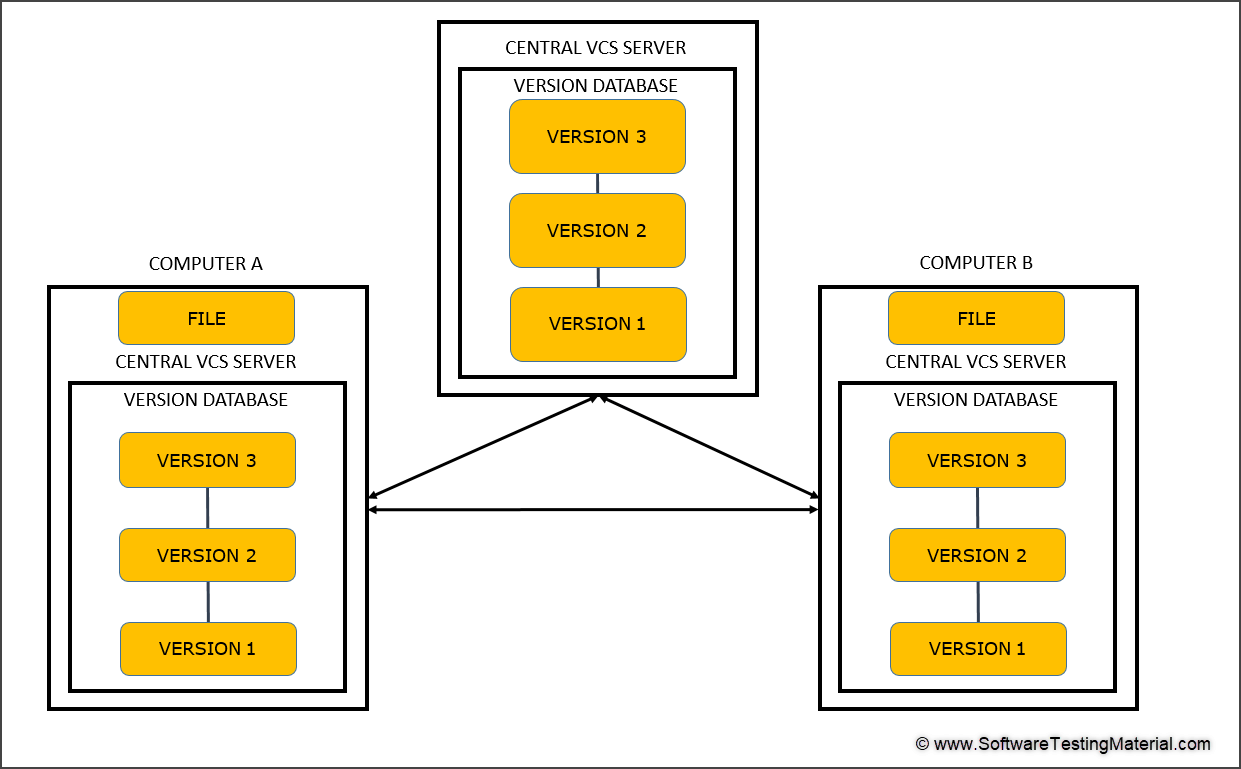
Centralized version control systems:
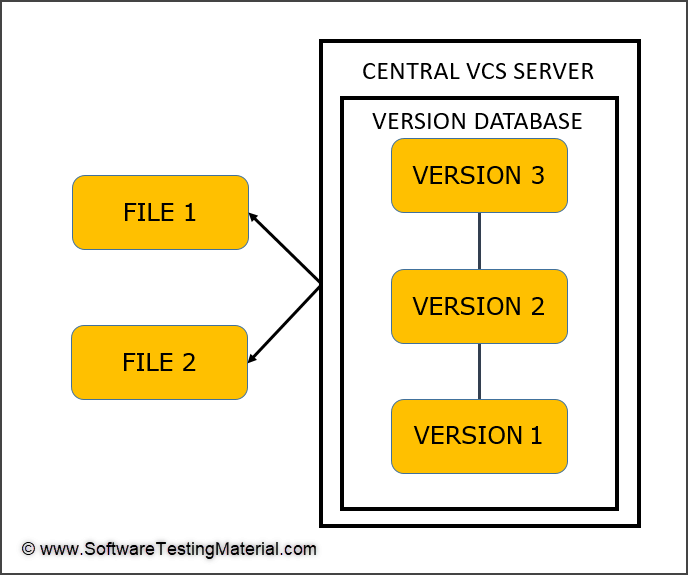
A centralized version control system is used when multiple people are working on the same project. If a person is working on Computer A and another person is working on Computer B and both are working on the same project, both of them can check out the code. But the problem with this system is that if both the persons change the code on the same line then whose code will be updated in the central database will depend on who added it in the last.
Distributed version control systems:
In this system, multiple people working on their own computers on a single project communicate with the central database as well as they can also communicate with each other. Using this model, all the changes done by everyone can be stored and no data will be lost.
What is Git?
Git is one of the most popular version control systems. It is one of the distributed version control systems. It is an open-source project which is compatible with many operating systems and IDEs.
It allows us to track changes in an application, or in a folder, or in a single file over time across different users, and different computers. Git takes a snapshot of all files whenever we create a new commit. Every committer on a project always has a copy of the whole repository on their machine. So, we can commit to the Git file system also in offline mode.
Git was created by Linus Torvalds in 2005 for the development of the Linux Kernel, with other kernel developers contributing to its initial development.
Git Installation
Check out this Step By Step Guide on How To Install Git on Windows Machine.
After installation, we need to let the Git know who we are. To do that we need to configure Git is to add a username or a name and email.
This is not used to log in anywhere. This is only used to track who made what changes.
git config --global user.name "Github_Username"

git config --global user.email "Your_Email@Domain.com"
Note: Replace Github_Username and Your_Email@Domain.com with your GitHub credentials.
What is GitHub and why use GitHub?
GitHub is a cloud-based Git repository hosting service. It lets individuals and teams work together on projects.
Git is a command-line tool whereas GitHub comes with a web-based graphical interface.
GitHub is an application allowing you to store remote repositories on their servers. It also provides a user-friendly platform to interact with and manage your repositories. It is a public platform that allows millions of users to share their projects with the world.
The main purpose is to allow people to collaborate together to build projects. But it’s not just limited to collaboration. On top of that, it can be used as a portfolio for your best work. One of the most useful features of GitHub is being able to access your repository from any location. Also, it’s an industry standard for hosting Git repositories.
Git vs GitHub:
We have learned what is Git and What is GitHub so far. Check this post where we have mentioned the difference between Git and GitHub in detail.
Git Lifecycle
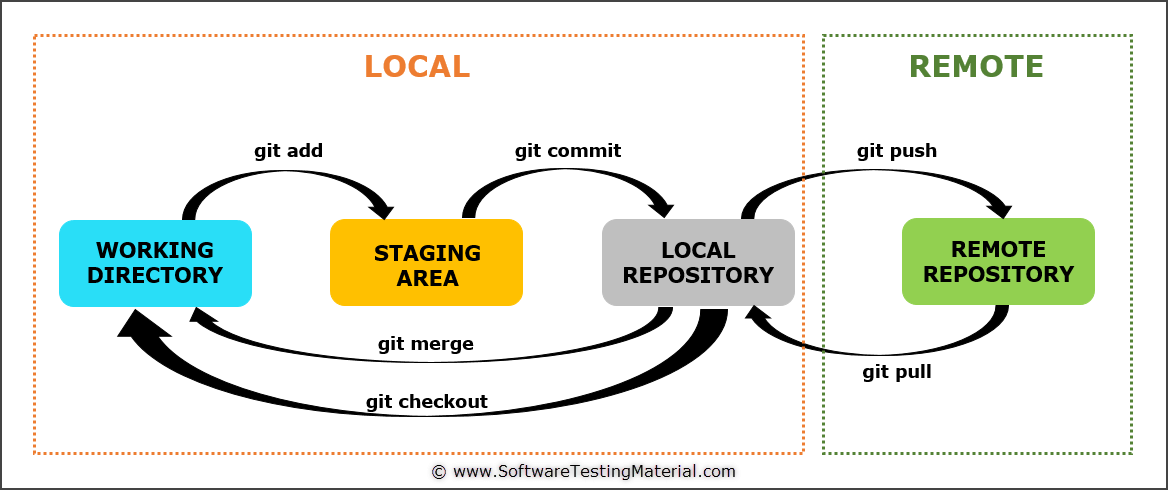
Working Directory: Stores all the project files
Staging Area: Acts an intermediate storage area
Repository: Holds all the committed files
Before Git tracks a change, it goes through a long chain of operations and tasks. Many of these tasks are user-controlled and are required for changes to be tracked correctly.
Before moving further, let’s talk about Repositories.
What is a Repository in GitHub?
Repositories, usually called ‘repos’, store the full history and source control of a project. They can either be hosted locally or on a shared server such as GitHub. Most repositories are stored on GitHub, while core contributors make copies of the repository on their machine and update the repository using the push/pull system. Any repository stored somewhere other than locally is called a ‘remote repository’.
First of all, pull all the information from your remote repository and make a direct copy of it in your local machine.
The working directory is your project at its current state and time. It contains all your files and everything at its current state. Let’s say you made a new file (test.py) and wrote some code in this file. So now you want to change or take this and take a snapshot of it and put it in your source control.
So after making the changes, you add your file to the staging area and commit your changes. Commit is just pretty much taking a snapshot and putting it in source code. The staging area is the bundle of all the modifications to the project that are going to be committed. So after you add your file to the staging area and commit, you then put them in the local repository.
So, you have made a bunch of changes and you have changed the local repository. Now local and remote repositories don’t match. Now you would push it to the remote repository and now they both matched up.
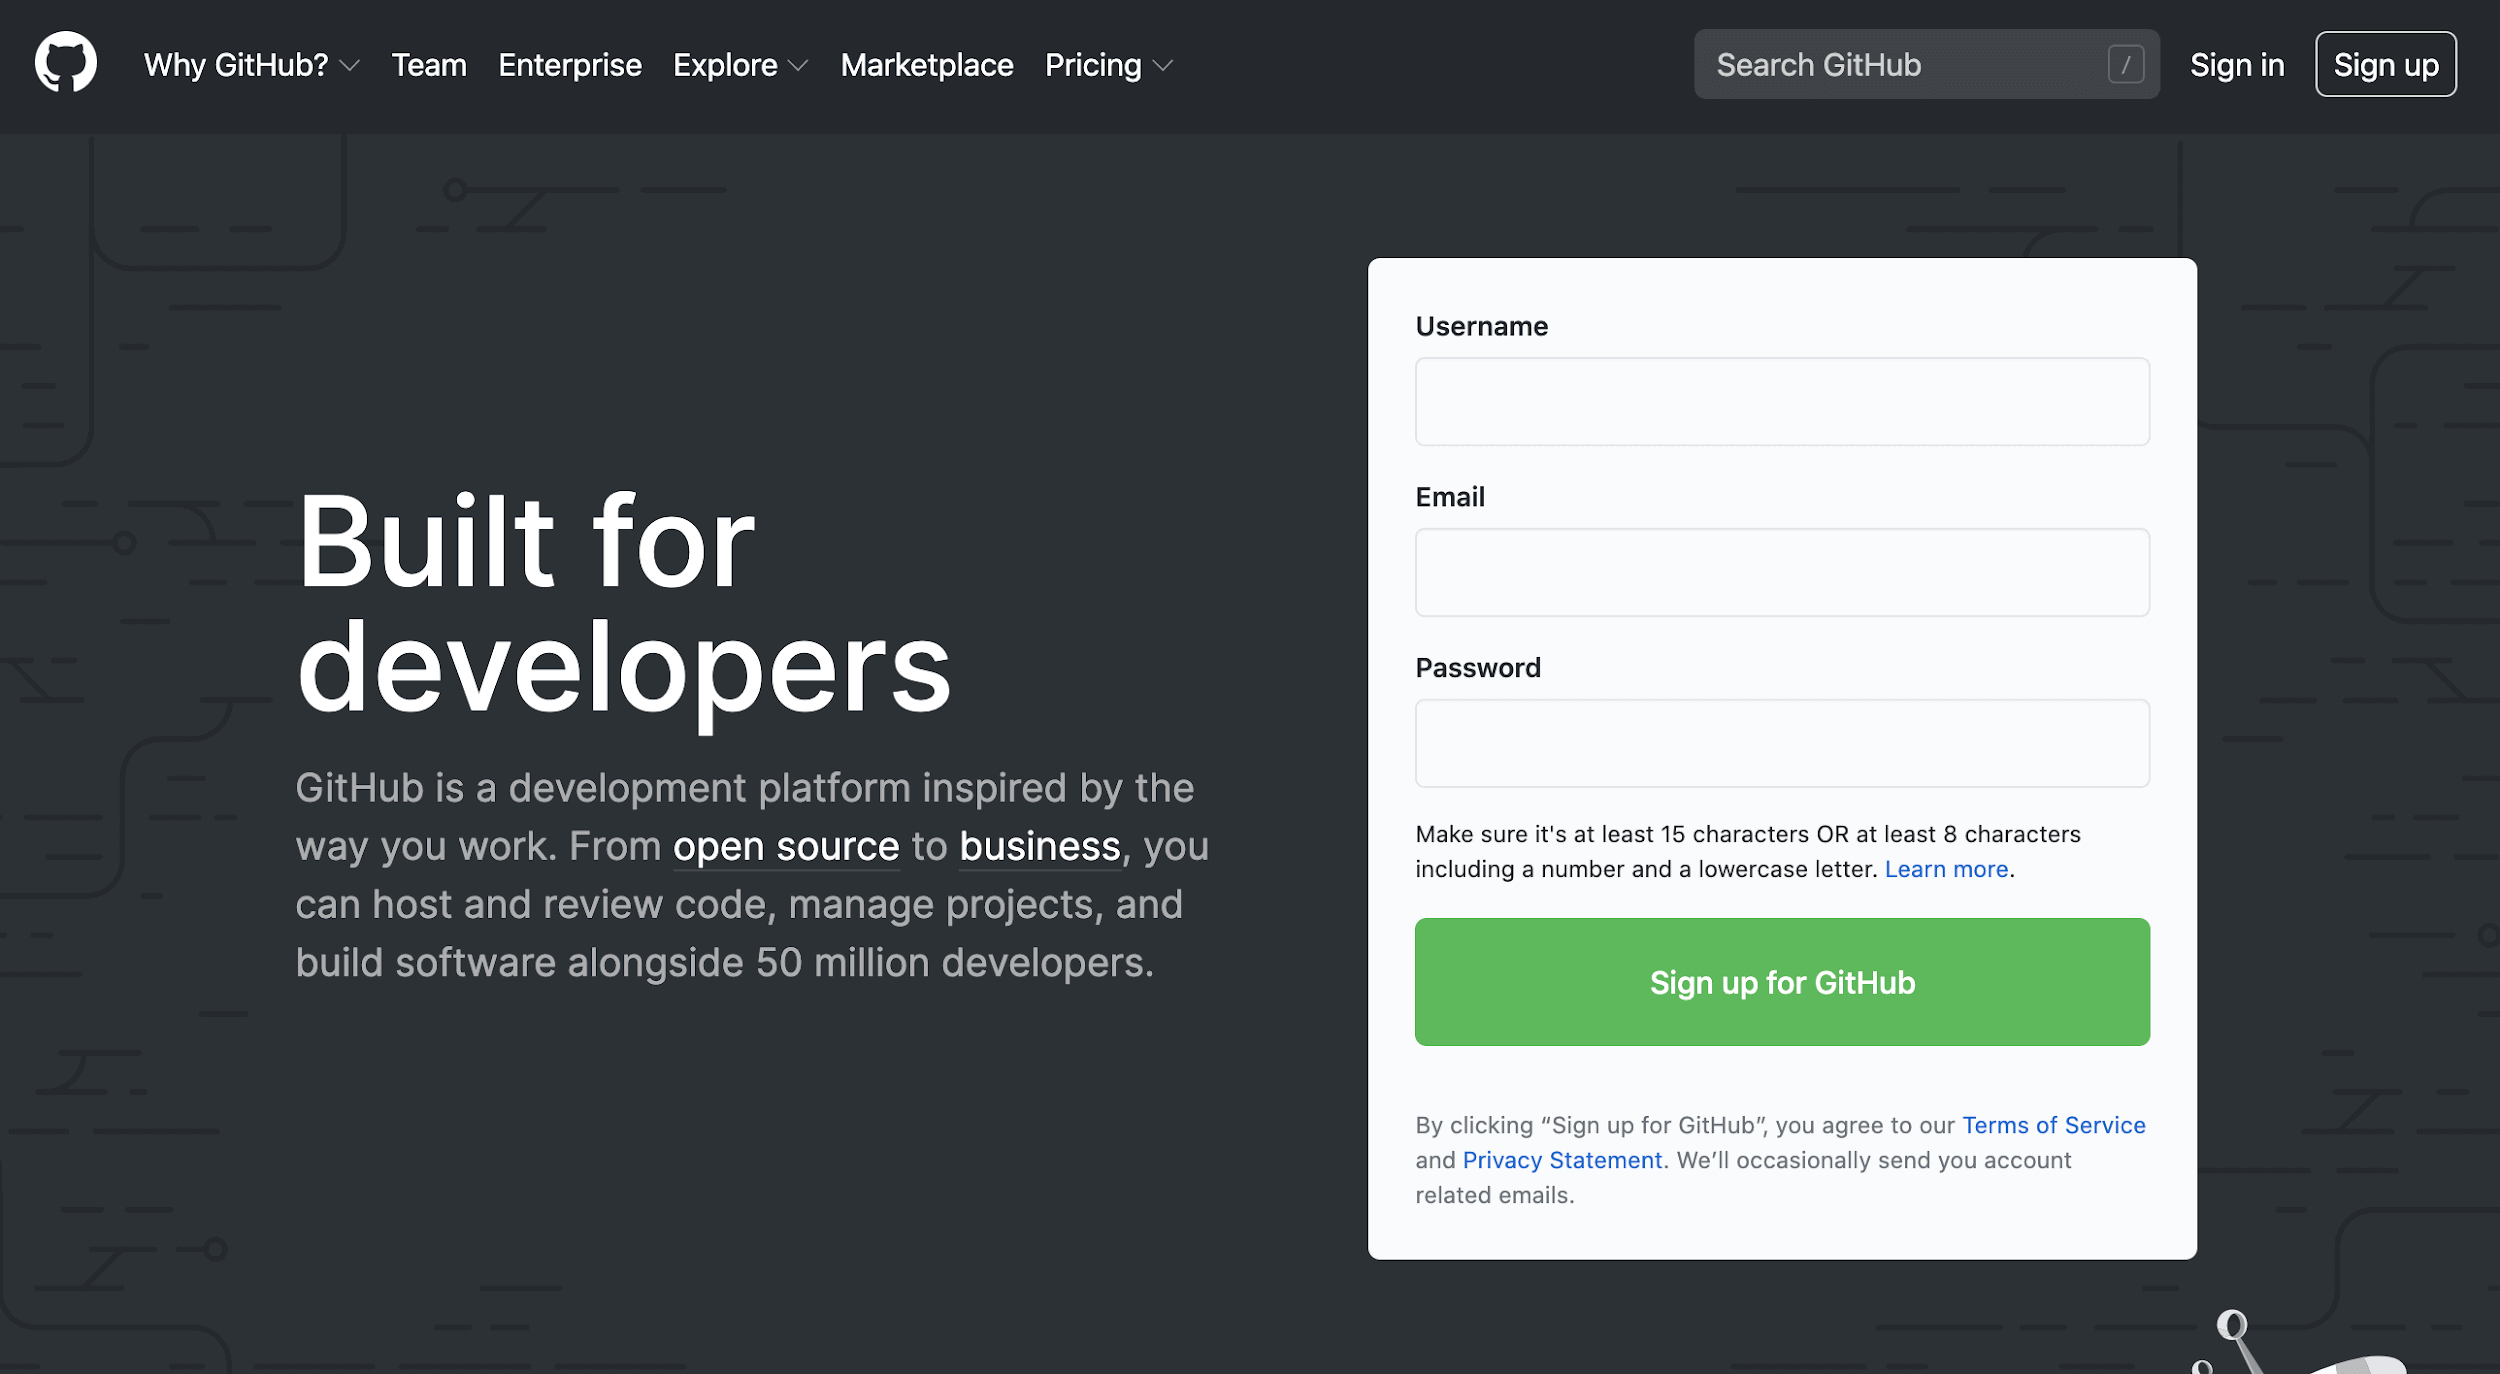
How to setup GitHub account:
1. Go to https://github.com and signup for a GitHub account using username, email, and password.
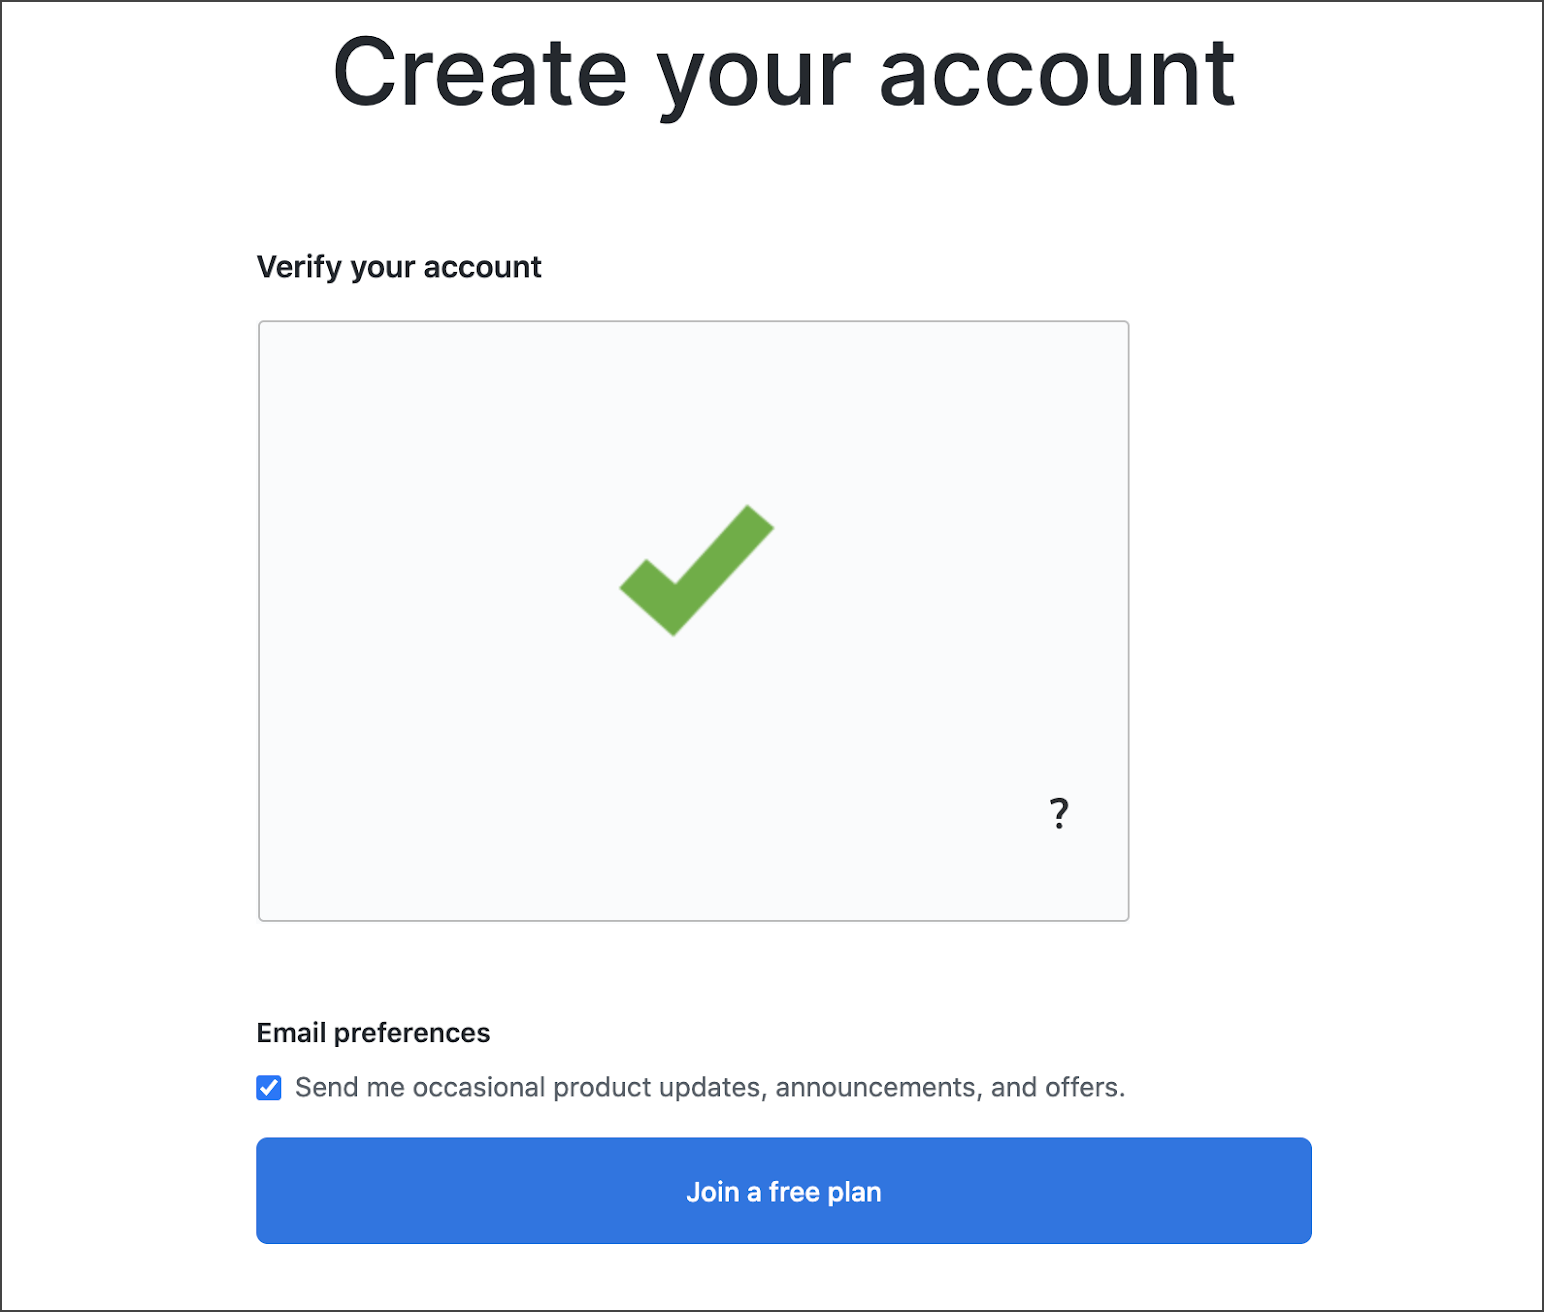
2. Once you fill out your information, you will see the verify account screen. Verify the captcha and click the Join a free plan button.
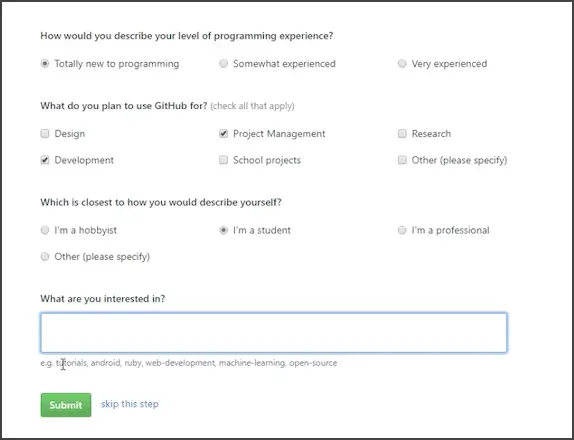
3. Now you need to fill out some other information related to programming experience and kind of work etc.
4.Now your GitHub account is created.
How to create a GitHub repository
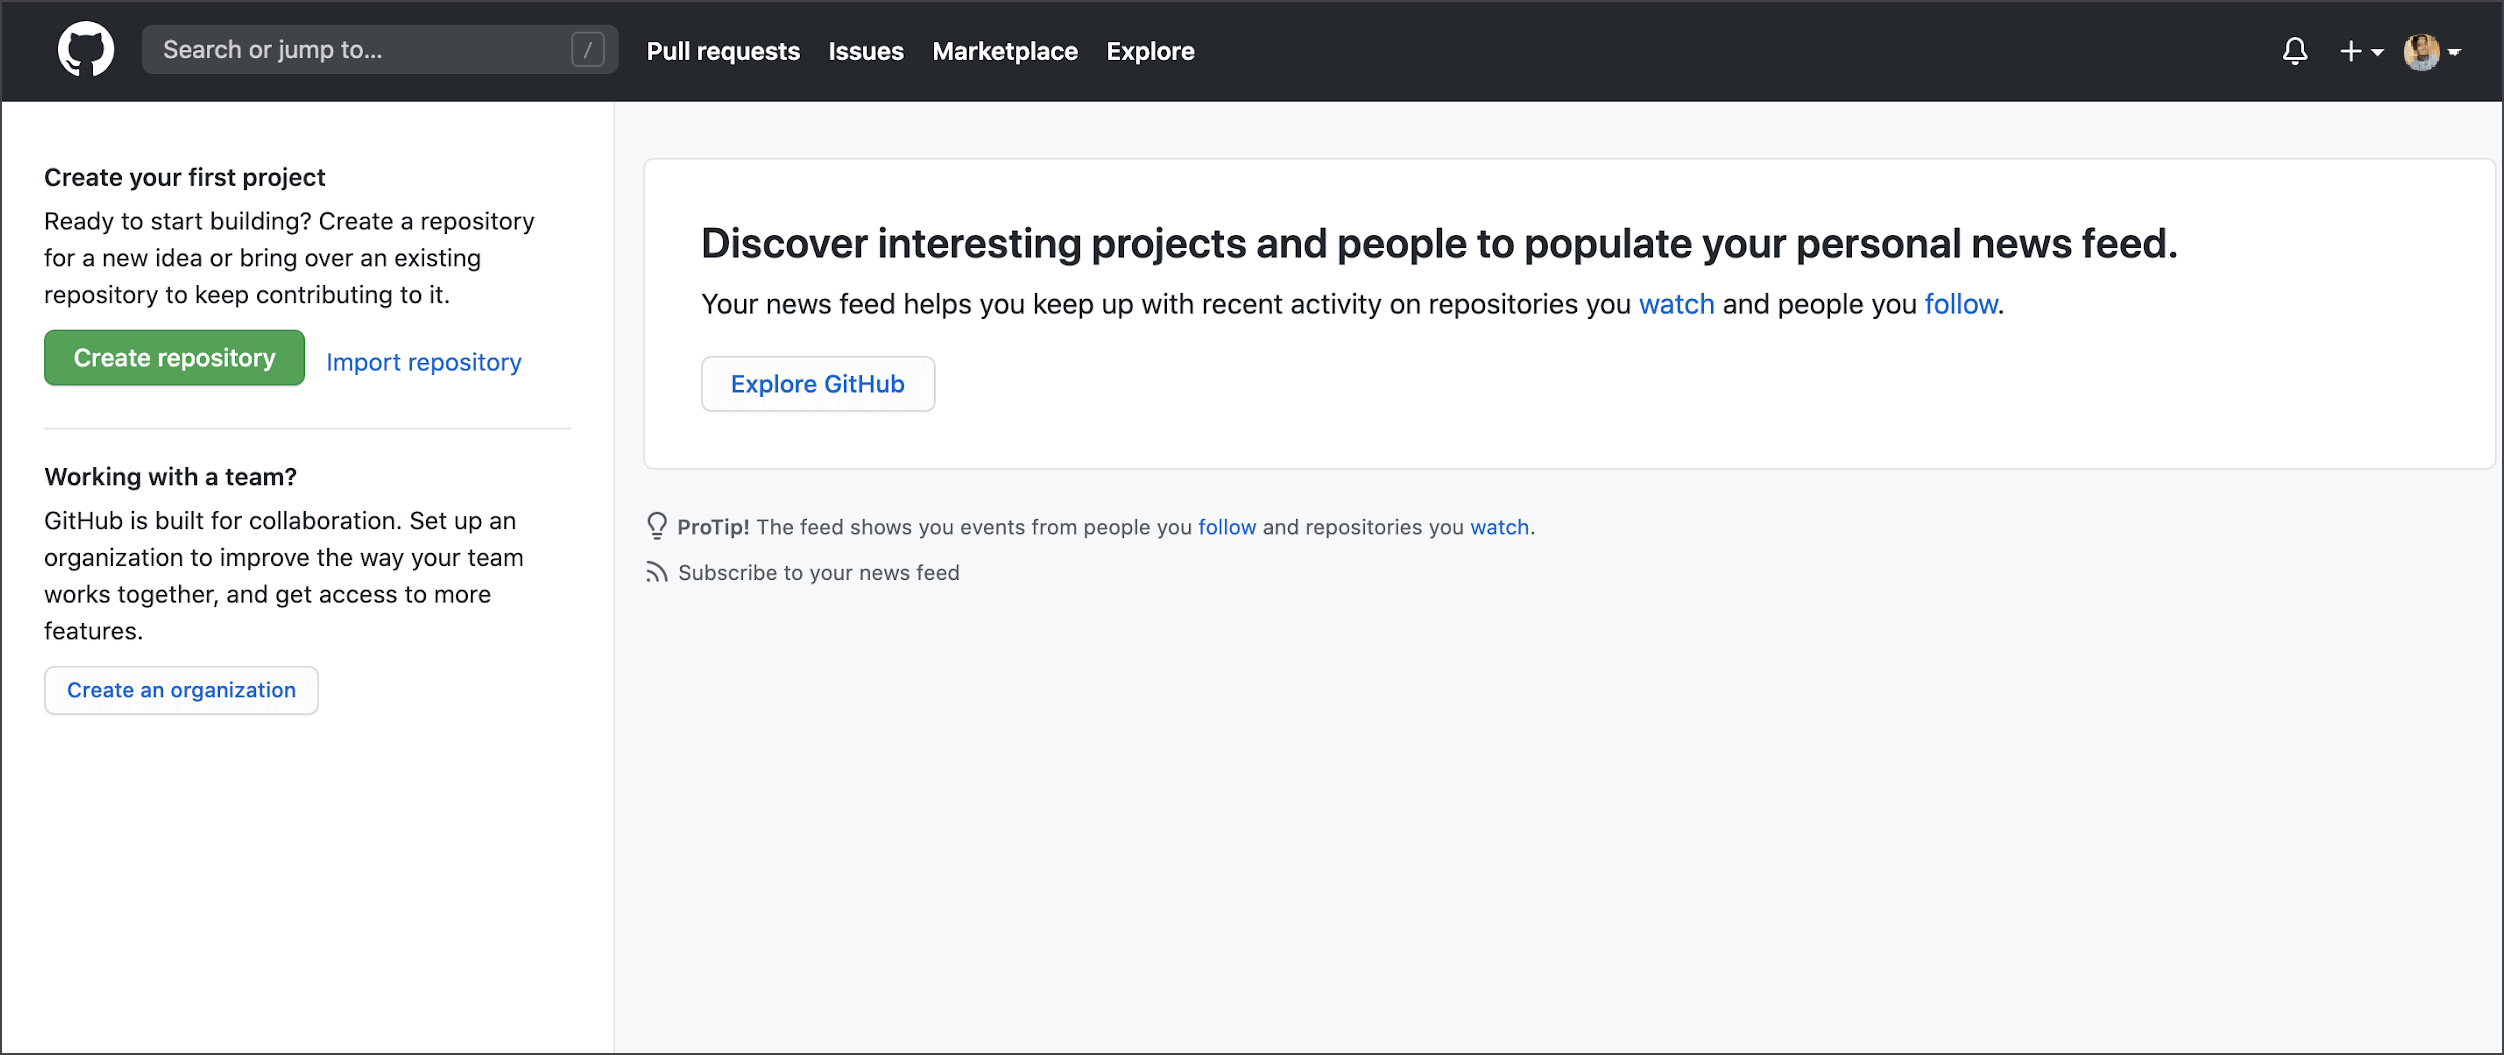
1. Go to the GitHub home page.
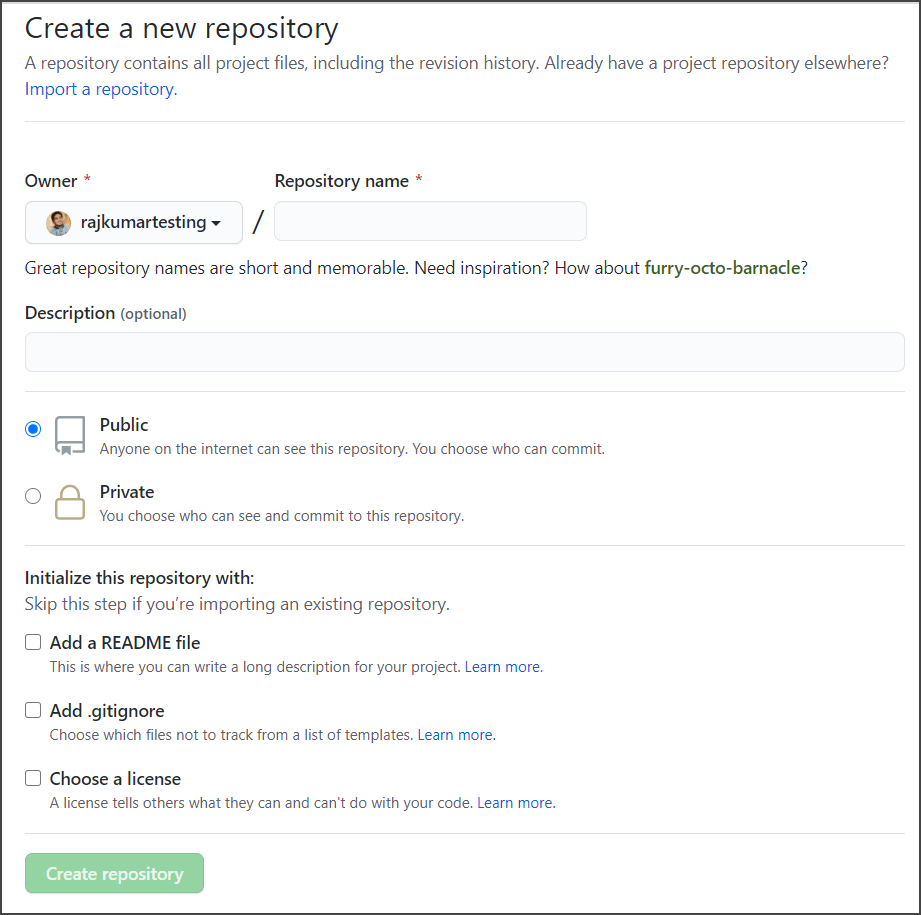
2. Click on Create repository. Add repo name, description and you can choose Private or Public. You can’t choose Private unless you have a paid plan.
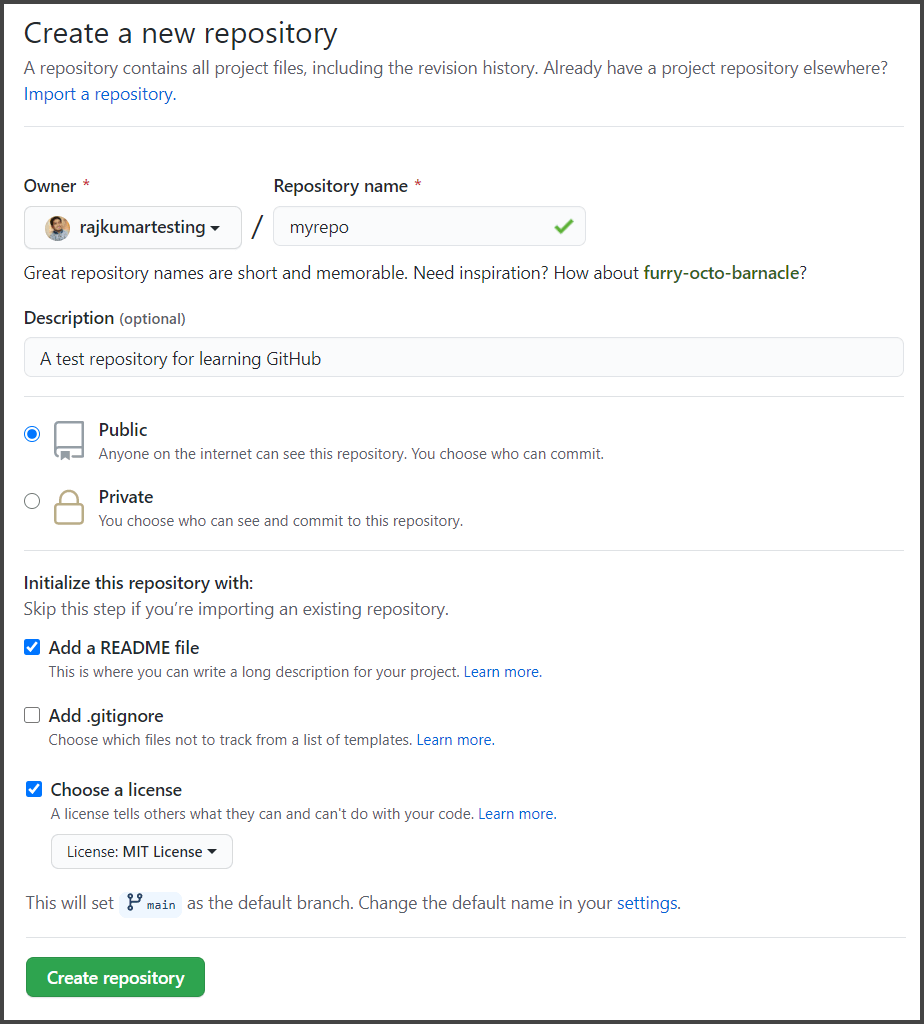
3. For now, let’s initialize this repository “myrepo” with a README file. You can add a license too. There are many different licenses for different things. For now, let’s choose an MIT license because this is the license that allows people to freely distribute it and copy it however they want.
4. This is what a repository looks like. There are a bunch of things we can see. There are a number of total commits, then we have the number of branches, number of releases, contributors, and license.
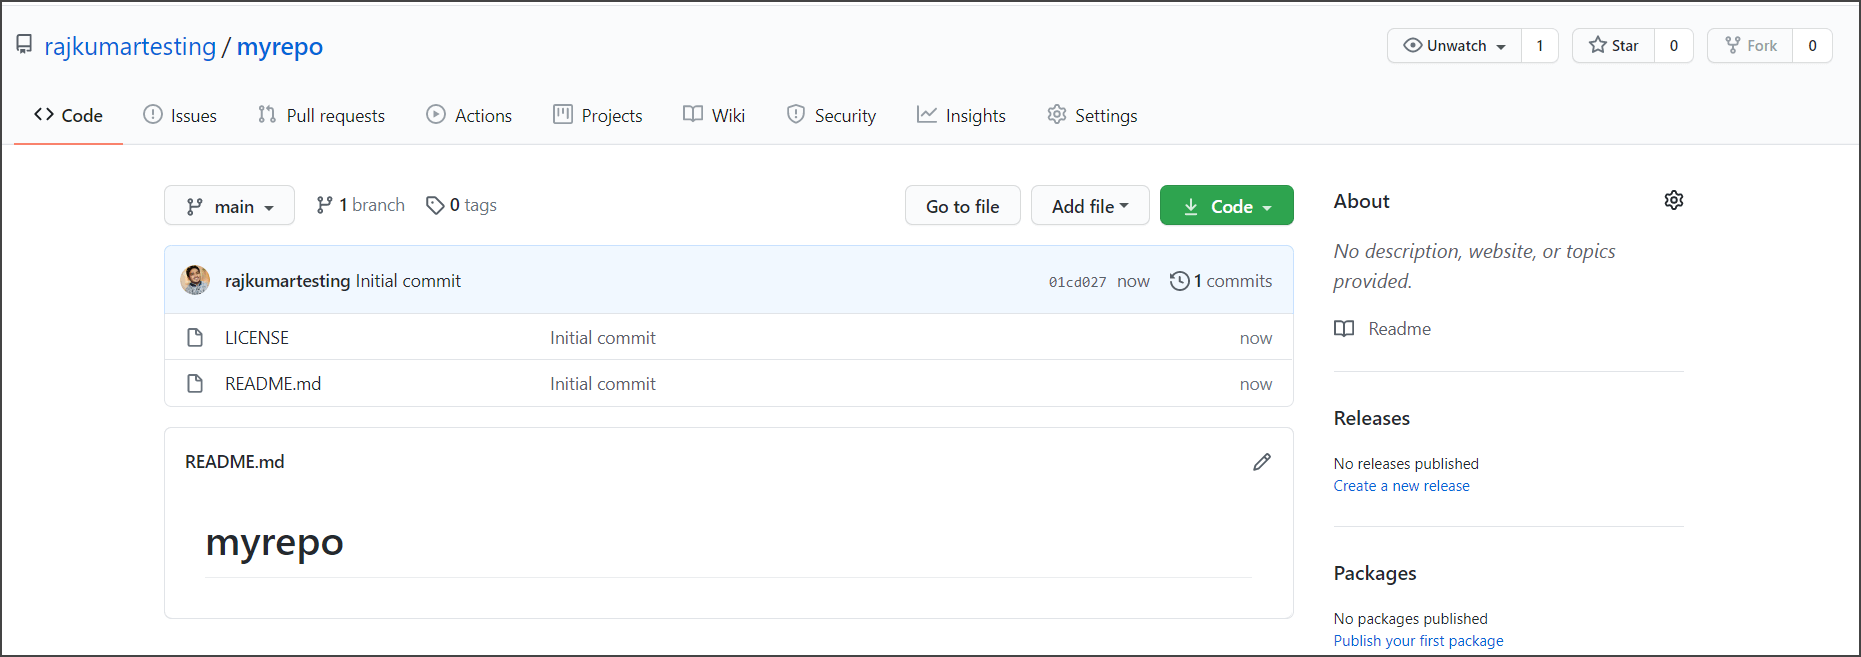
5. There are a bunch of other tabs at the top of the page.
Issues: Issues can be labeled by contributors. Anyone who is working on your project can actually find an issue and list it. What you and other contributors can do is go and look through and find these issues and try and fix them. So it’s a really useful feature on Github.
Pull Request: To request access to pull your project onto their local machine.
Projects: This is just a bunch of workflow management. Projects can be managed in the same place you keep your code.
Wiki: It is actually a bigger place to layout something like a summary. It’s just a kind of quick and concise place to list your project. You can list documentation of some of the application libraries or other things.
Insights: Insights allow you to see a lot of different features of your repository. It is just like Google Analytics or any other analytics program. It includes merged pull requests, open pull requests, and a bunch of different metrics.
Settings: In settings, we can change some of the things about our repository. You can change the name of your repo, delete your repository. You can invite collaborators from here. There is an option to switch between the default branches and other branches.
Fundamental Git commands:
1. git –help: When this command is hit in our terminal, Git will give a list of its most common commands. If it is followed by a specific command then it will give you a full detailed description of that particular command.
2. git config: With this command, we have to first set username and email address. Then we have to tell Git how it should handle the line endings, carriage return, and line feed on our machine, depending on the operating system we have. This is achieved with the configuration auto control line feed (autocrlf) and safe control line feed (safecrlf).
With the option –system, –global, or — local, we tell Git for which scope on our machine we want to set a specific configuration.
–system contains configurations for every user on all their repositories on one machine.
–global gives the configuration for one particular user
–local contains the configurations for a specific repository
The command is :
git config --system/global/local
git config --global user.name "Github_Username"
git config --global user.email "Your_Email@Domain.com"
core.autocrlf input(true)
core.safecrlf warn
core.editor "code --wait"
Initializing a Git Repository
To start using Git, the first step is to initialize a repository, a location for files, and their revision history.
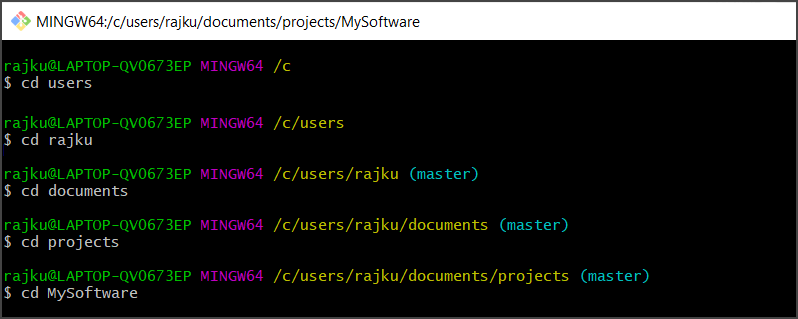
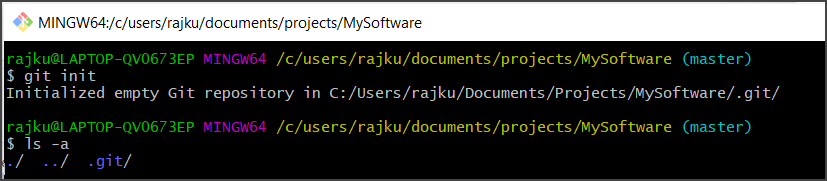
Let’s create a new repository now. Create a folder or a directory “MySoftware”. Then switch to that directory. Once inside the folder, use the git init command to convert the directory into an empty Git repository.
With this command, a hidden directory named “.git” is generated. This is created by Git and it’s where it stores all of the information about our repository. Note that the master branch is always the default branch when we initialize a Git project.
To see the files generated by git init, run the following command: ls -a
First, change Directory. Here I am changing the directory to MySoftware folder in my case.
Adding & Removing files:
Now we are going to be working with the staging area. In general, files in a repository can have the following statuses:
1. Not tracked
2. Staged
3. Committed
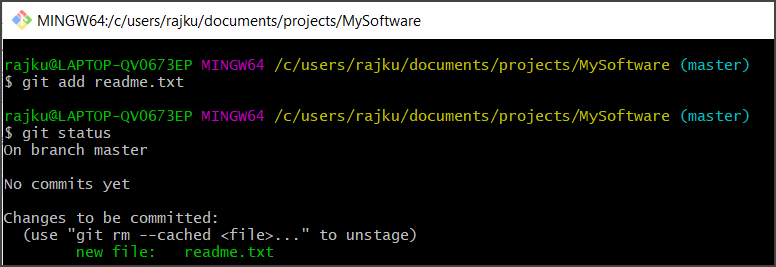
To find out the actual status of files in a repository, the git status command is used. Let’s say we have created a file ‘readme.txt’ in our repository.

– Running git status will have the following output:
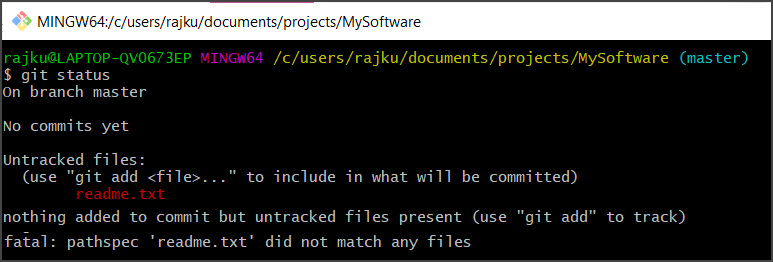
– As you can see the file readme.txt is untracked. Untracked means that the file is not being tracked by Git for changes. We should explicitly say which files it should follow/track.
– The git add ‘file name’ command tells Git to track the file. This step is called staging. Let’s add our readme.txt file:
– Now, our file is in the staging area. Let’s say we have more untracked files. If now we will do git status, we can see there are untracked files. To add all files in the staging area together, we use “git add .” command
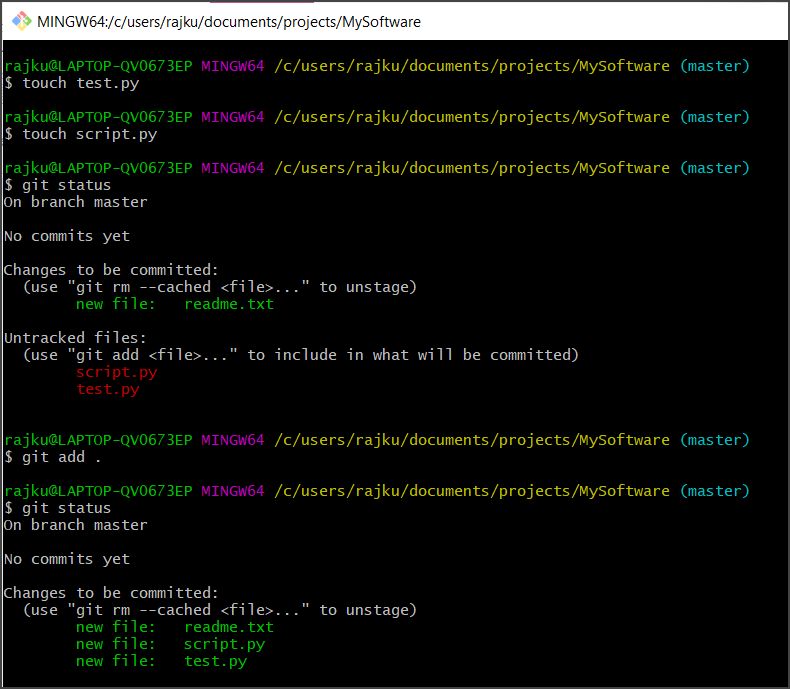
Note: The touch command in Git is the easiest way to create new, empty files.
– Now let’s say we want to delete a file ‘script.py’. If we run the git status command, it shows 3 files to be committed and 1 file deleted.

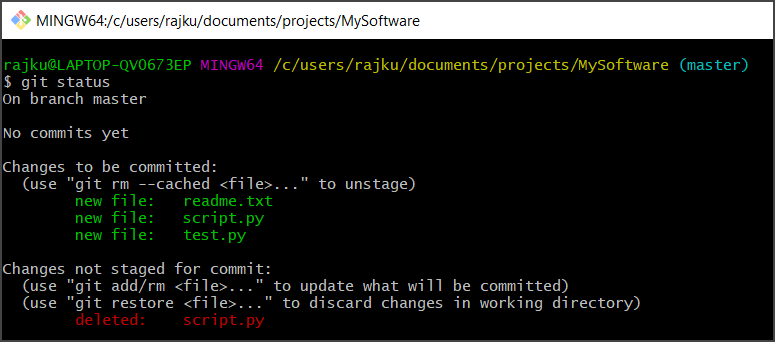
– Run “git add .” to update files in the staging area.

.gitignore file :
If you don’t want Git to track some specific files, you can ignore them. That is done using the .gitignore file. Anything listed in the .gitignore file is ignored by Git and won’t be visible in the repository. Let’s create a .gitignore file and password.txt file.
Write a sample text inside the password.txt and edit the content of .gitignore adding the file name (“password.txt”) we want to be ignored.
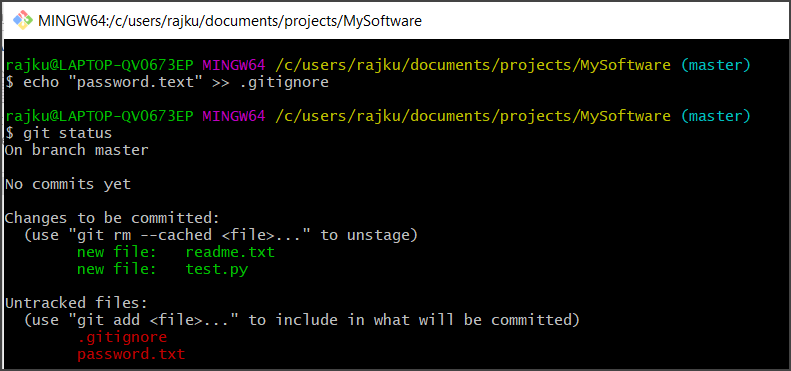
Running git status shows that only the .gitignore file is untracked. The files listed here are in the Staging area and they are not in our repository yet. To add them to the repository, we need to commit them.
Git Commit :
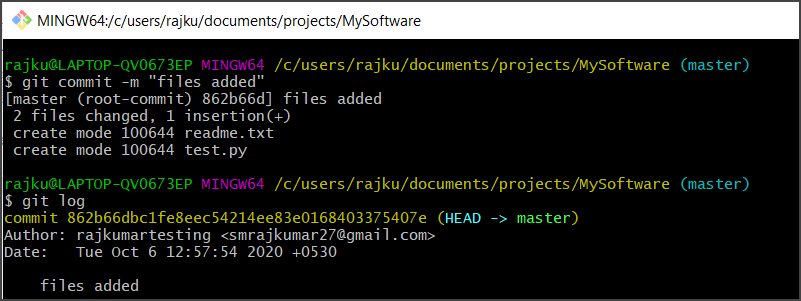
The git commit command saves the state of your project by adding snapshots of staged files to the repository. This command includes the -m flag with a message describing what we have changed.
The command is: git commit -m “message”
Executing git status after a git commit verifies that tracked files are up to date. Only changes to staged files(added using the git add command) will be added to the repository with the git commit command.
If you want to see the history of your commits, use the git log command. This command inversely lists your commits, their dates, authors, and some other related information about each commit.
Cloning and Pushing :
Now after committing the changes, the subsequent step is to push the local repository to the Git server on a remote location (such as GitHub or Bitbucket).
After creating a remote repository we have the following options:
1. Clone the repository and start making changes.
2. Initialize a local repository and then connect it with the remote repository.
Cloning should be done at the very start of the project. The clone command is nothing but downloading a remote repository:
Go to your GitHub repository. In the top right above the list of files, click on the Clone or download the drop-down menu.
Copy the URL for cloning over HTTPS
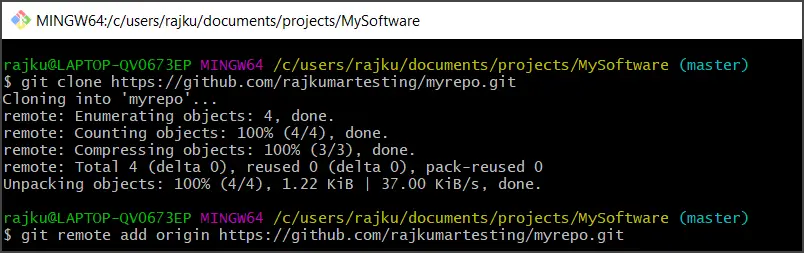
git clone https://github.com/rajkumartesting/myrepo.git
If you have already initialized a local repository, you can connect it to the remote repository using the following command:
git remote add origin https://github.com/rajkumartesting/myrepo.git
Pushing Remotely
After making our local changes and commits, it’s time to push the changes to the remote repository. The push command lets you transfer commits from local to the remote repository.
git push -u origin master

Let’s suppose the name of our remote is origin and the default local branch name is master. The -u indicates that parameters need to be remembered so that next time we can simply run git push, Git will know what to do.
Pulling
git pull command simply downloads the latest content from the remote repository and copies the latest changes to the local repository.
The command to pull new changes on our local repository is:
git pull origin master

To check what is different from our last commit, use git diff command.
git diff HEAD
Reset & Checkout:
To check changes within files that have already been staged, run git diff –staged
You can even reset the staging area using the reset command:
git reset ‘file name’
This reverts the file from the staged status and all the changes will still remain in the file. You can use the checkout command to reset the file to the latest committed version:
git checkout — ‘file name’
Branches:
Branches are a very important part of Git. Branching allows you to make a copy of your working project and change it without affecting the main branch (master branch), giving an opportunity to work on the same project with different commits.
We create a new branch whenever we want to work on a new feature or fix a bug. After the work is done on that branch, it is then merged with the master branch.
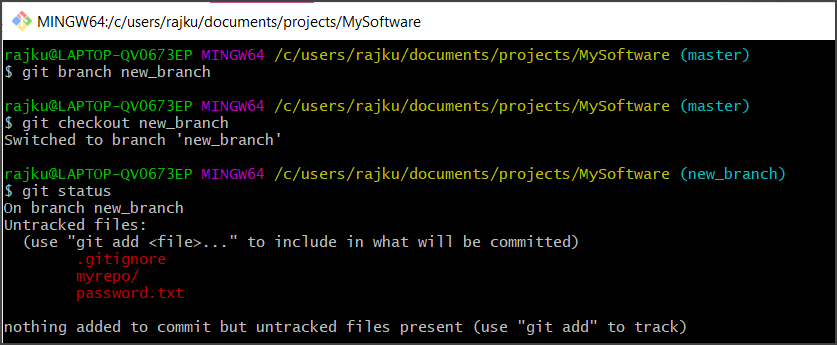
Creating a new branch is done using the branch command:
git branch new_branch
Then we need to switch to the branch using the checkout command:
git checkout new_branch
There is a shortcut to create and switch to a new branch:
git checkout -b new_branch
Now, every change made in the new branch called new_branch won’t affect the master branch. This means you can safely work on the project without breaking anything. Each branch has its own history, staging area, and working directory.
In order to see the list of your branches, run the git branch command in the project directory.
Stash:
The git stash command temporarily caches any changes you have made to your working copy so you can switch to something else, and then come back and recover them later.
After stashing you can make any changes and perform other git operations such as create new commits and switch branches. Then you can come back and reapply your stash.
The stash stays locally on your Git repository. They will not be transferred to the server when you push.
There are 2 ways to re-load (re-apply) the stashed changes:
git stash pop
pop will remove stashed changes from the stashed state.
git stash apply
apply applies the same stashed changes to multiple branches.
Fetching (git fetch):
We get all the data by fetching. This means all the remote branches and all its objects, commits, snapshots, files are fetched into the local repository.
The command is: git fetch
Merging (git merge) :
We can merge those changes with merging which we have fetched into our local repository into the current active branch in the working directory, thereby also the staging area. This simply means our index file is updated.
The command is: git merge
In order to remove a branch that you don’t need anymore, the command is:
git branch -d branchname
Hope you have learnt basics of Git from this Git Tutorial.
If you have any questions, please comment below.
Related Posts: